
Attachments
Overview
Attachments are standardized files such as compliance certificates, policy documents, and company credentials—that can be directly attached to your questionnaires or responses. Examples include: HIPAA Compliance Certificate, GDPR Compliance Policy, ISO Certifications and Safety Manuals or Insurance Proofs.
They serve as supporting documents that strengthen your questionnaire submissions and can be reused across projects.
Only Super Admins, Org Admins, and Workspace Admins can access the Attachments tab.
Viewing Attachments
Profile-> Settings-> Innform Q/A-> Attachments-> When you open the Attachments section, you’ll see a list of all uploaded files with key metadata:
-
Attachment Name – e.g., HIPAA, GDPR, ISO 9001
-
Description – Short summary of what the document represents
-
Last Updated On – Shows when the file was last modified or replaced
-
Updates By - Who updates the file last
-
Expiry Date – Automatically tracks when the document will expire or need renewal
- Expired attachments are visually highlighted, helping you keep your documentation up to date.
-
A green check mark or red cross should indicate whether the file has been uploaded successfully or not.
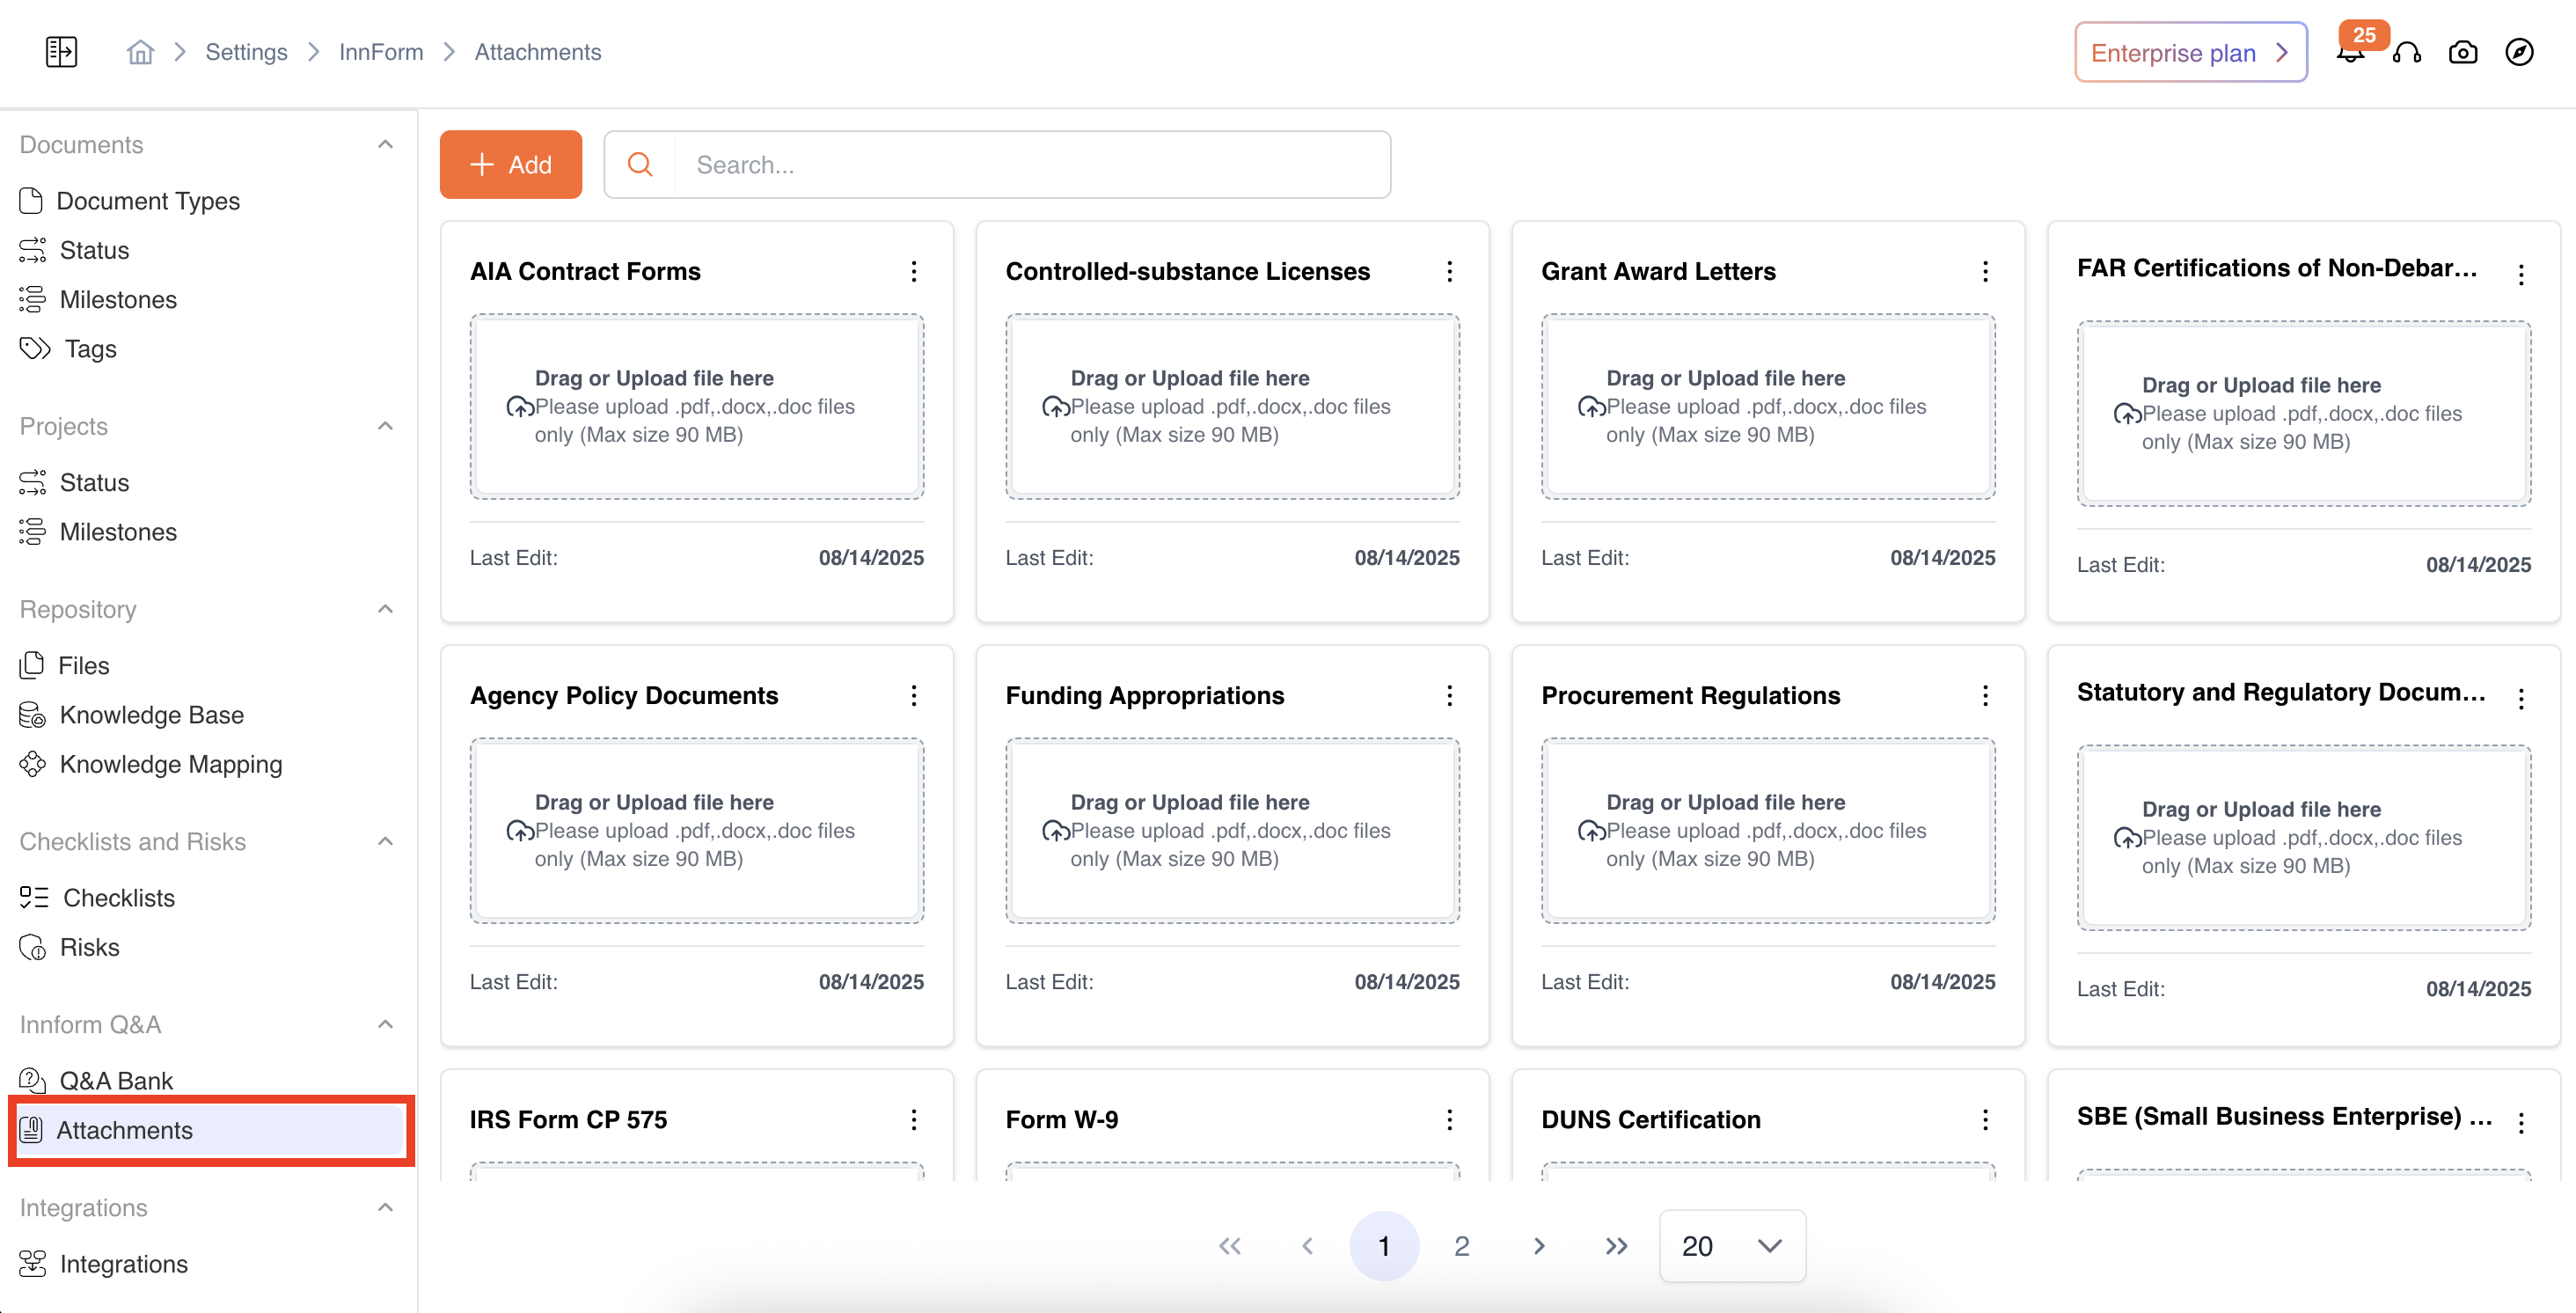
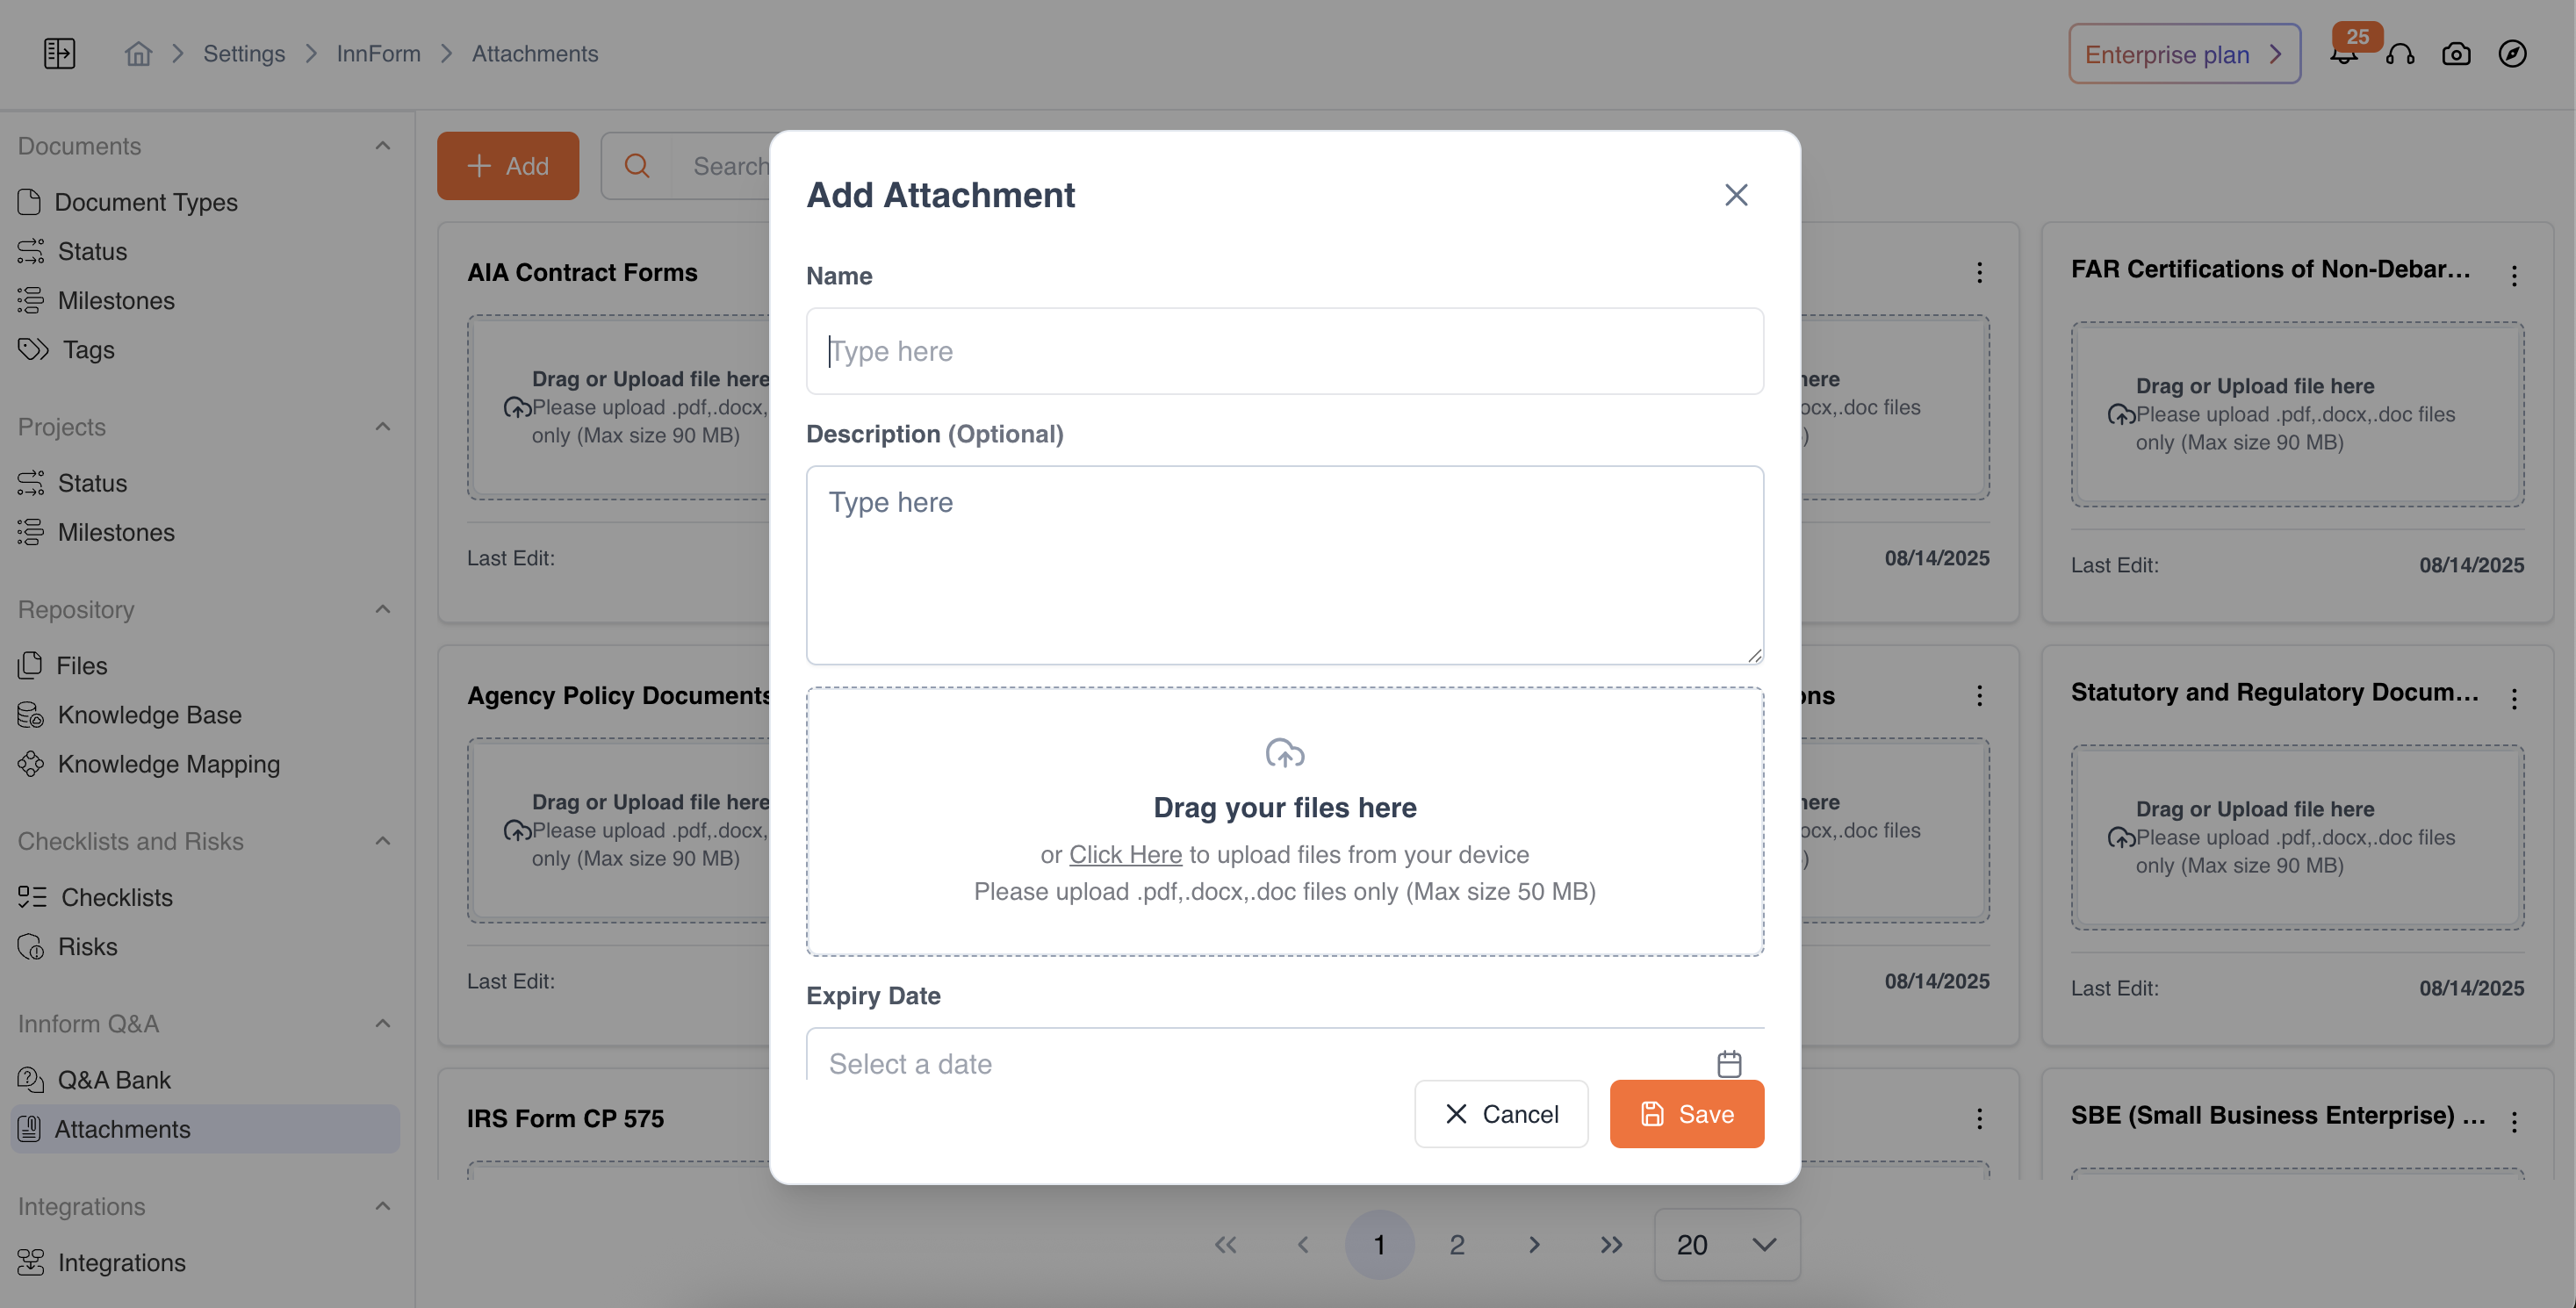
Adding a New Attachment
- Click Add Attachment.
- Fill in the required details:
- Name – Enter a clear title for the attachment (e.g., GDPR Compliance Statement).
- Description – Add a short note or context about the file.
- Upload File – Drag and drop or browse to upload the document (PDF, DOCX, DOC, Maximum file size: 90 MB.)
- Expiry Date (Optional) – Specify an expiry date if the document needs periodic renewal.
- Click Save to add it to your repository.
The new attachment will now appear in your list and will be available for use across questionnaires and projects.
Predefined Attachment Templates
Your workspace may already have predefined attachment placeholders for standard compliance or policy documents (e.g., Insurance Certificate, Safety Policy, Financial Disclosure). All you need to do is:
- Locate the required placeholder name by searching for it using the search bar
- Drag and upload your file directly into that slot.
This helps ensure that all required attachments are consistently maintained.
Managing Attachments
Each attachment supports the following actions:
- View – Preview the document by clicking on the document
- Edit – Update the name, description, file, or expiry date. Action buttons-> Edit
- Delete – Permanently remove the attachment from the list. Actions buttons -> Delete
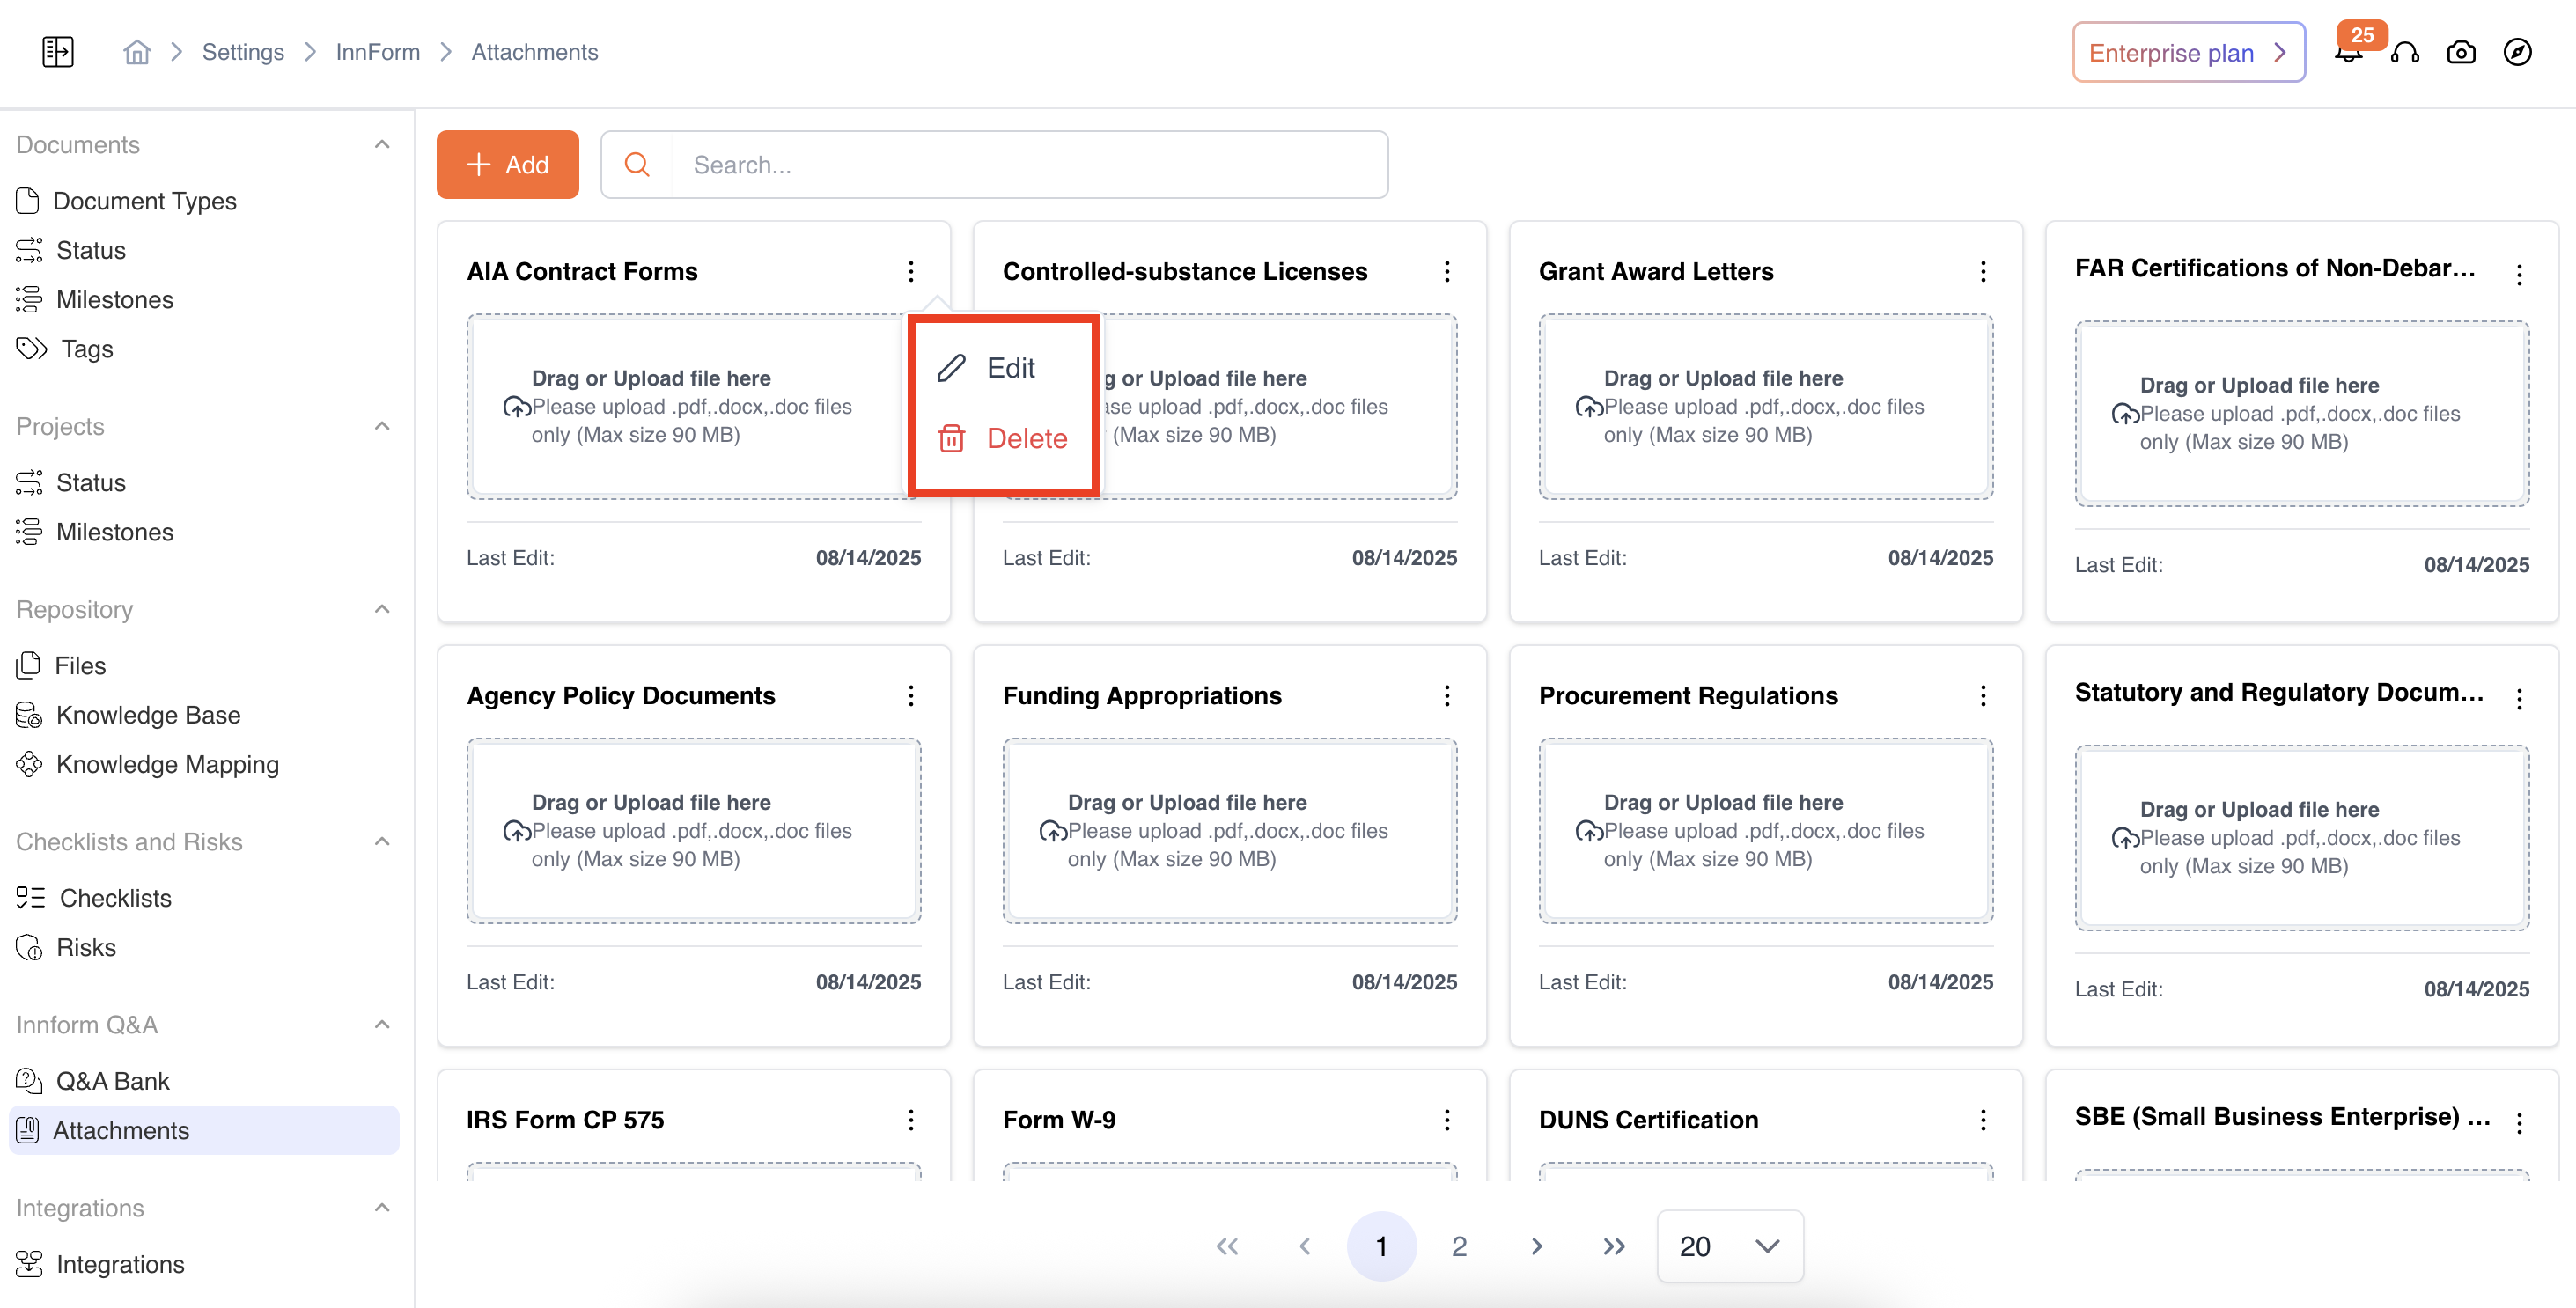
If a document has expired, you can update it by editing and uploading the renewed version.
Video Reference - https://app.guidde.com/share/playbooks/iWeVL3dW7dUDZ8eGCyMLAY?origin=CLhuhyWU58WFuigCugTh3i3jhGs2
Updated 4 months ago