
Getting Started with Workspaces
How Workspaces Help You Work Better
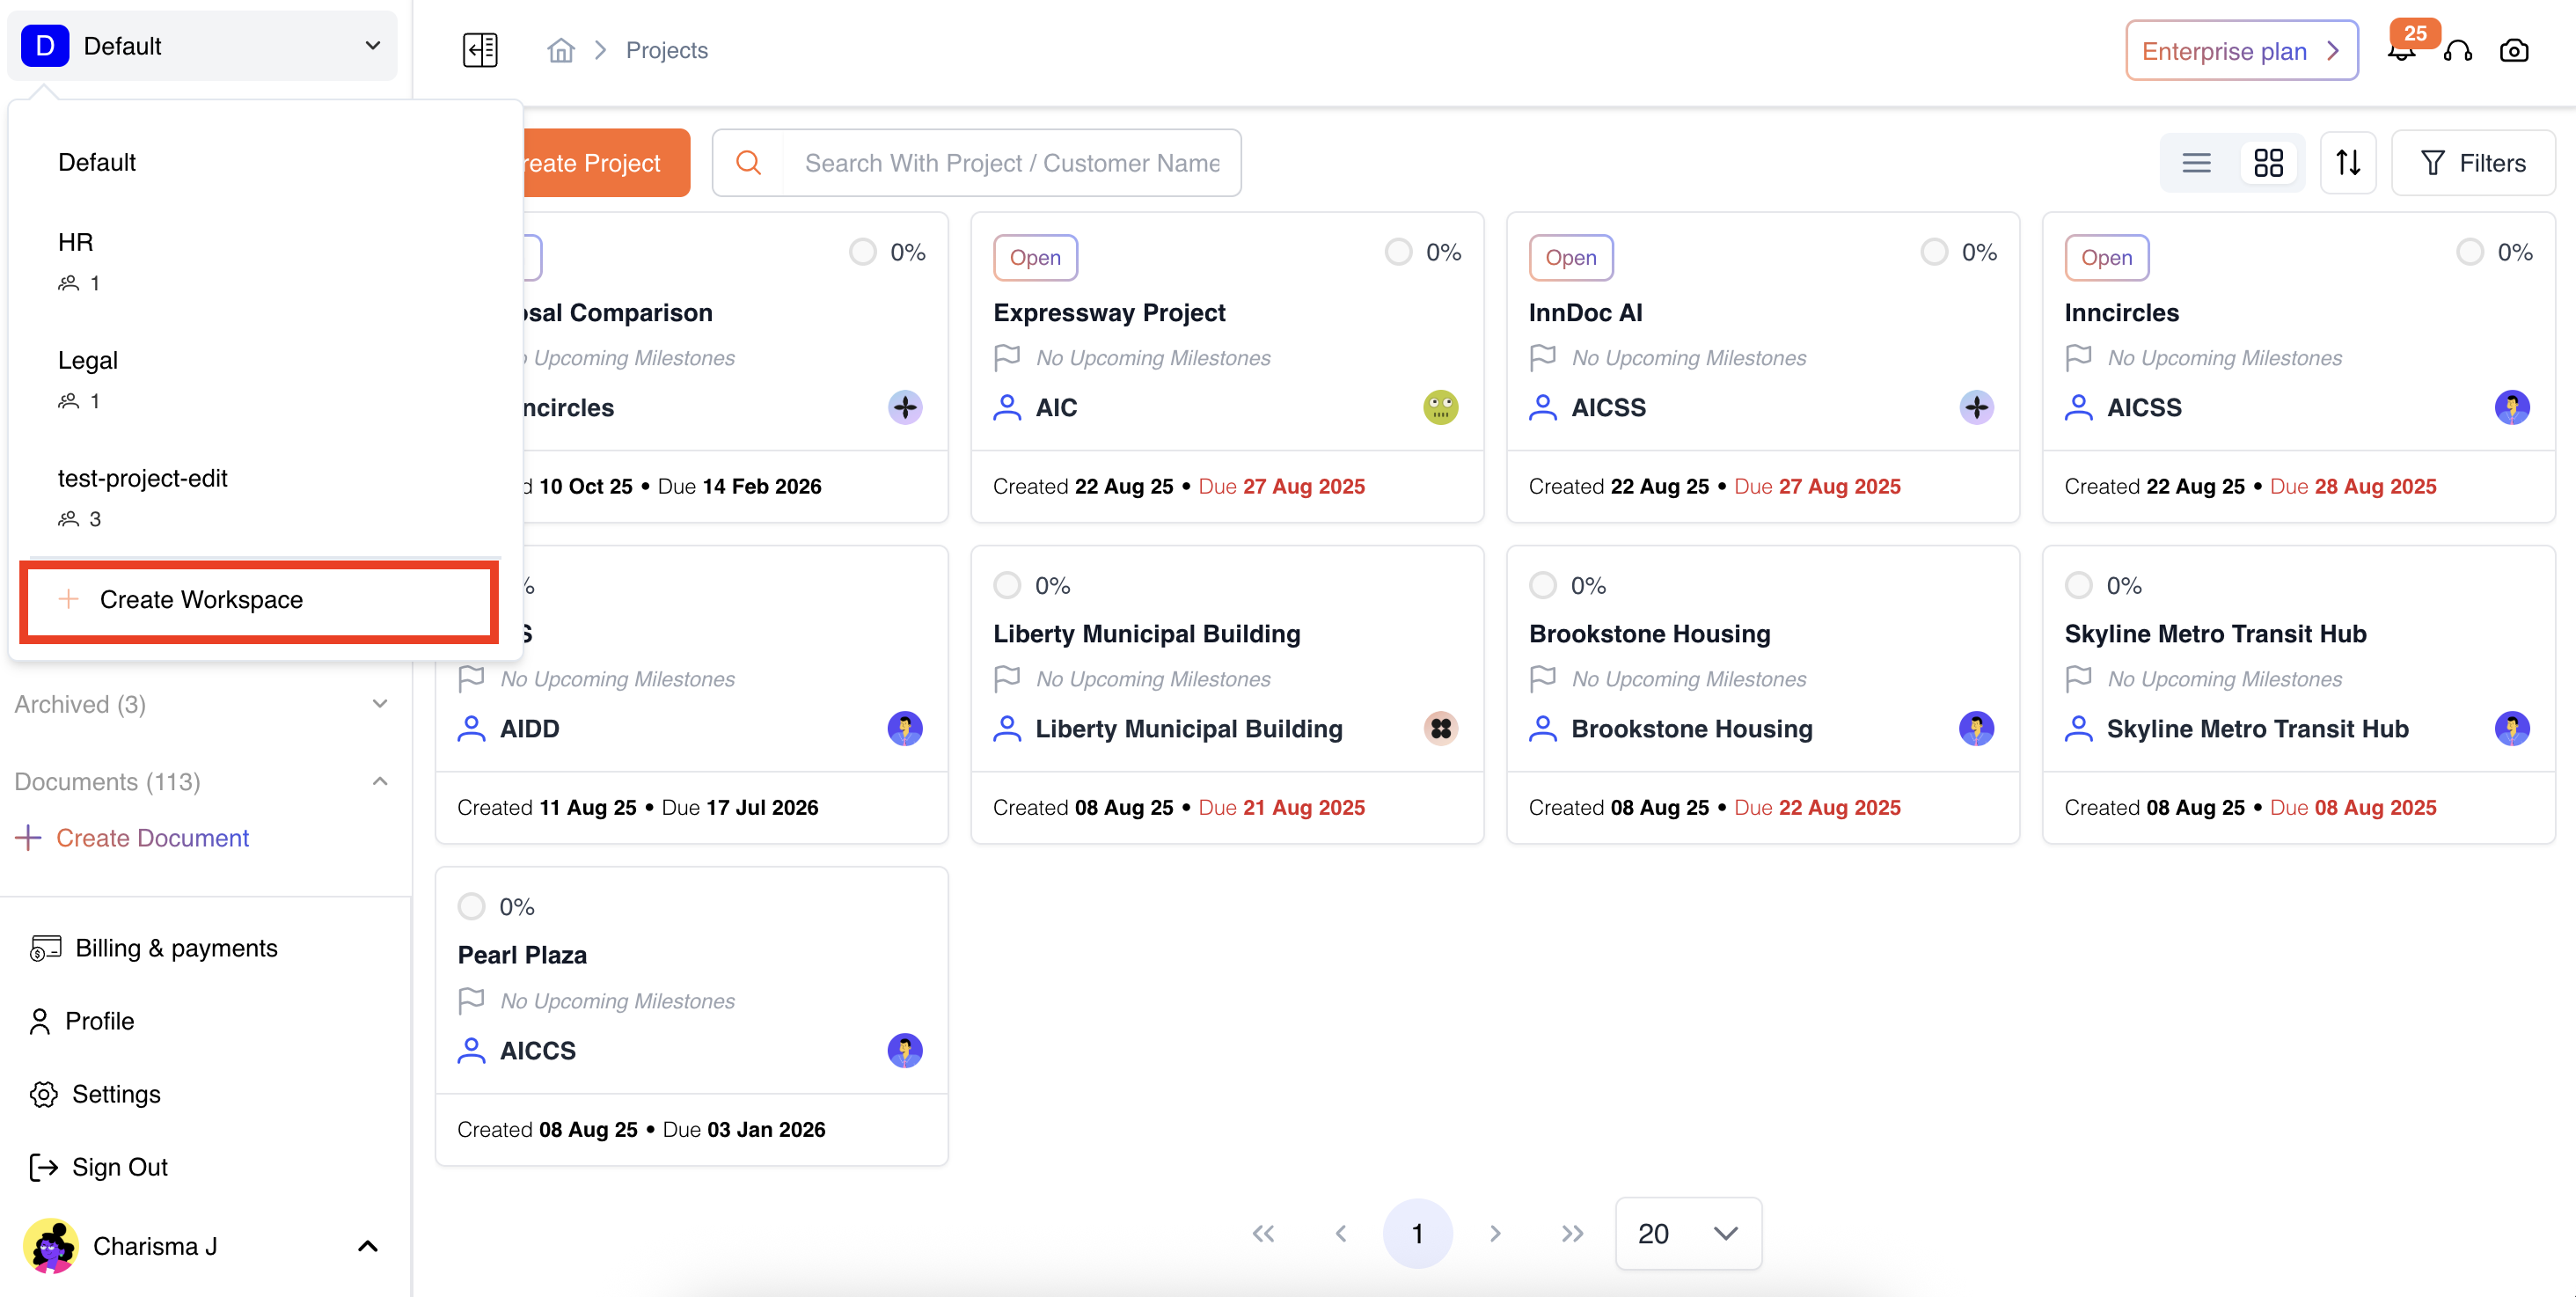
Workspaces allow each team (like HR, Contractor, Finance, Legal, etc.) to manage their work independently — all under one organizational account. You can easily switch between workspaces, add teammates, and manage access without mixing up documents or workflows.
Creating a New Workspace
-
Click “+ Create Workspace” in the workspace switcher (top navigation).
-
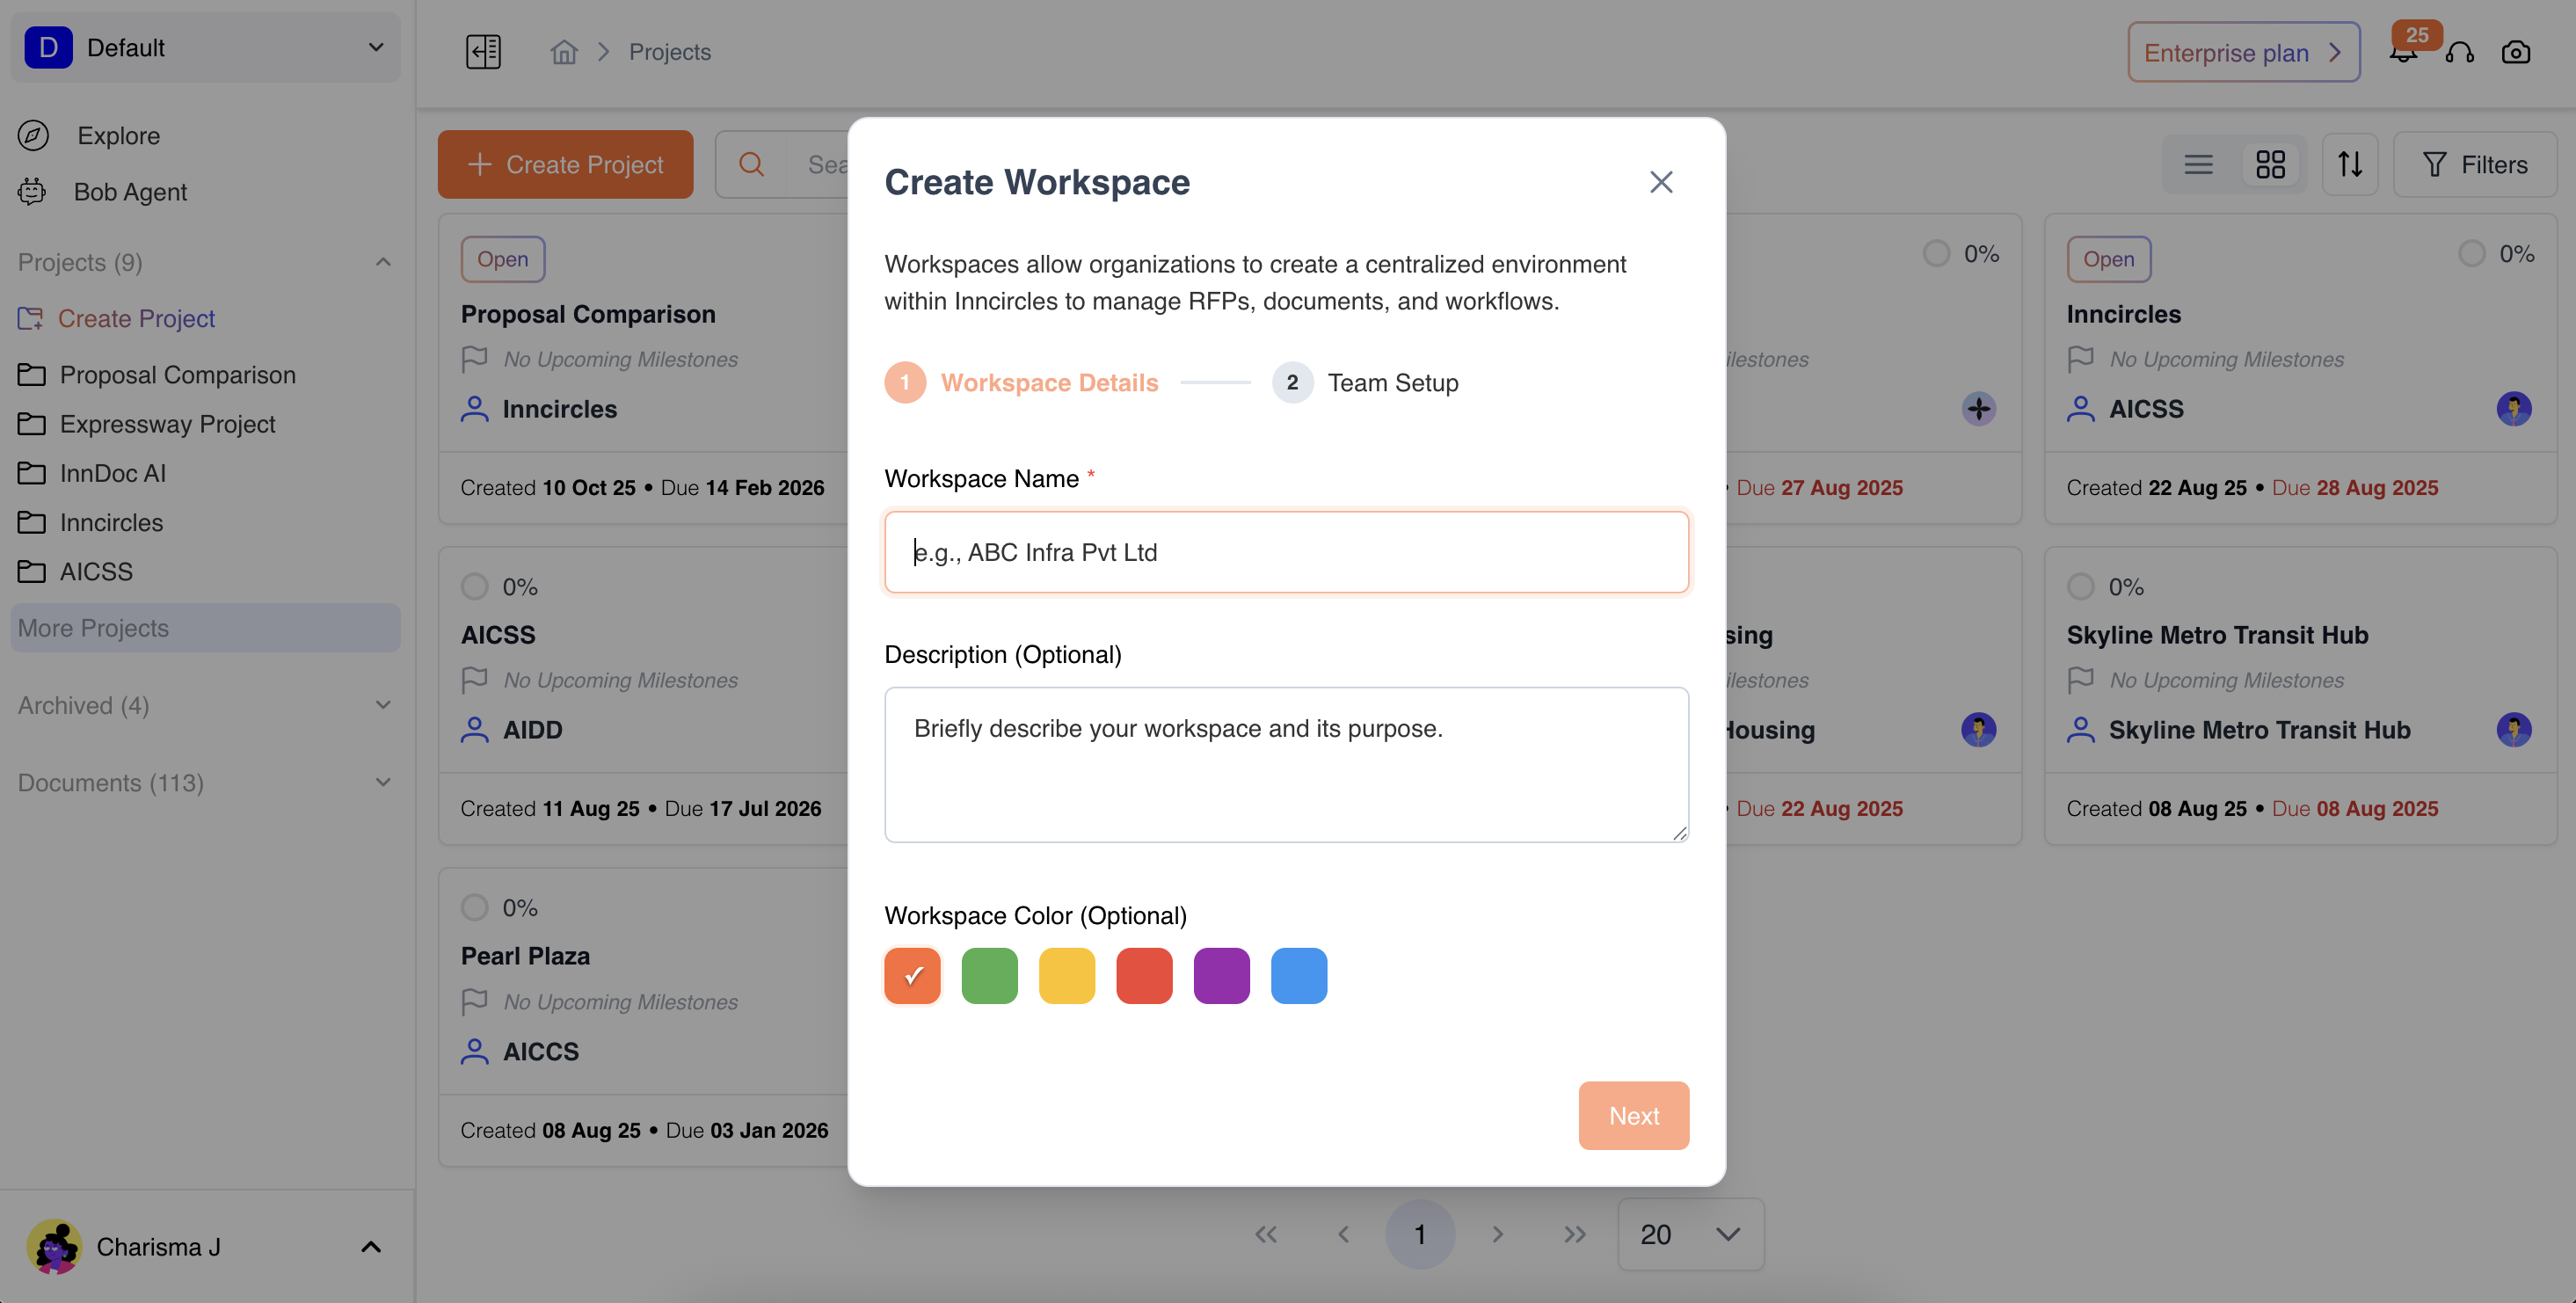
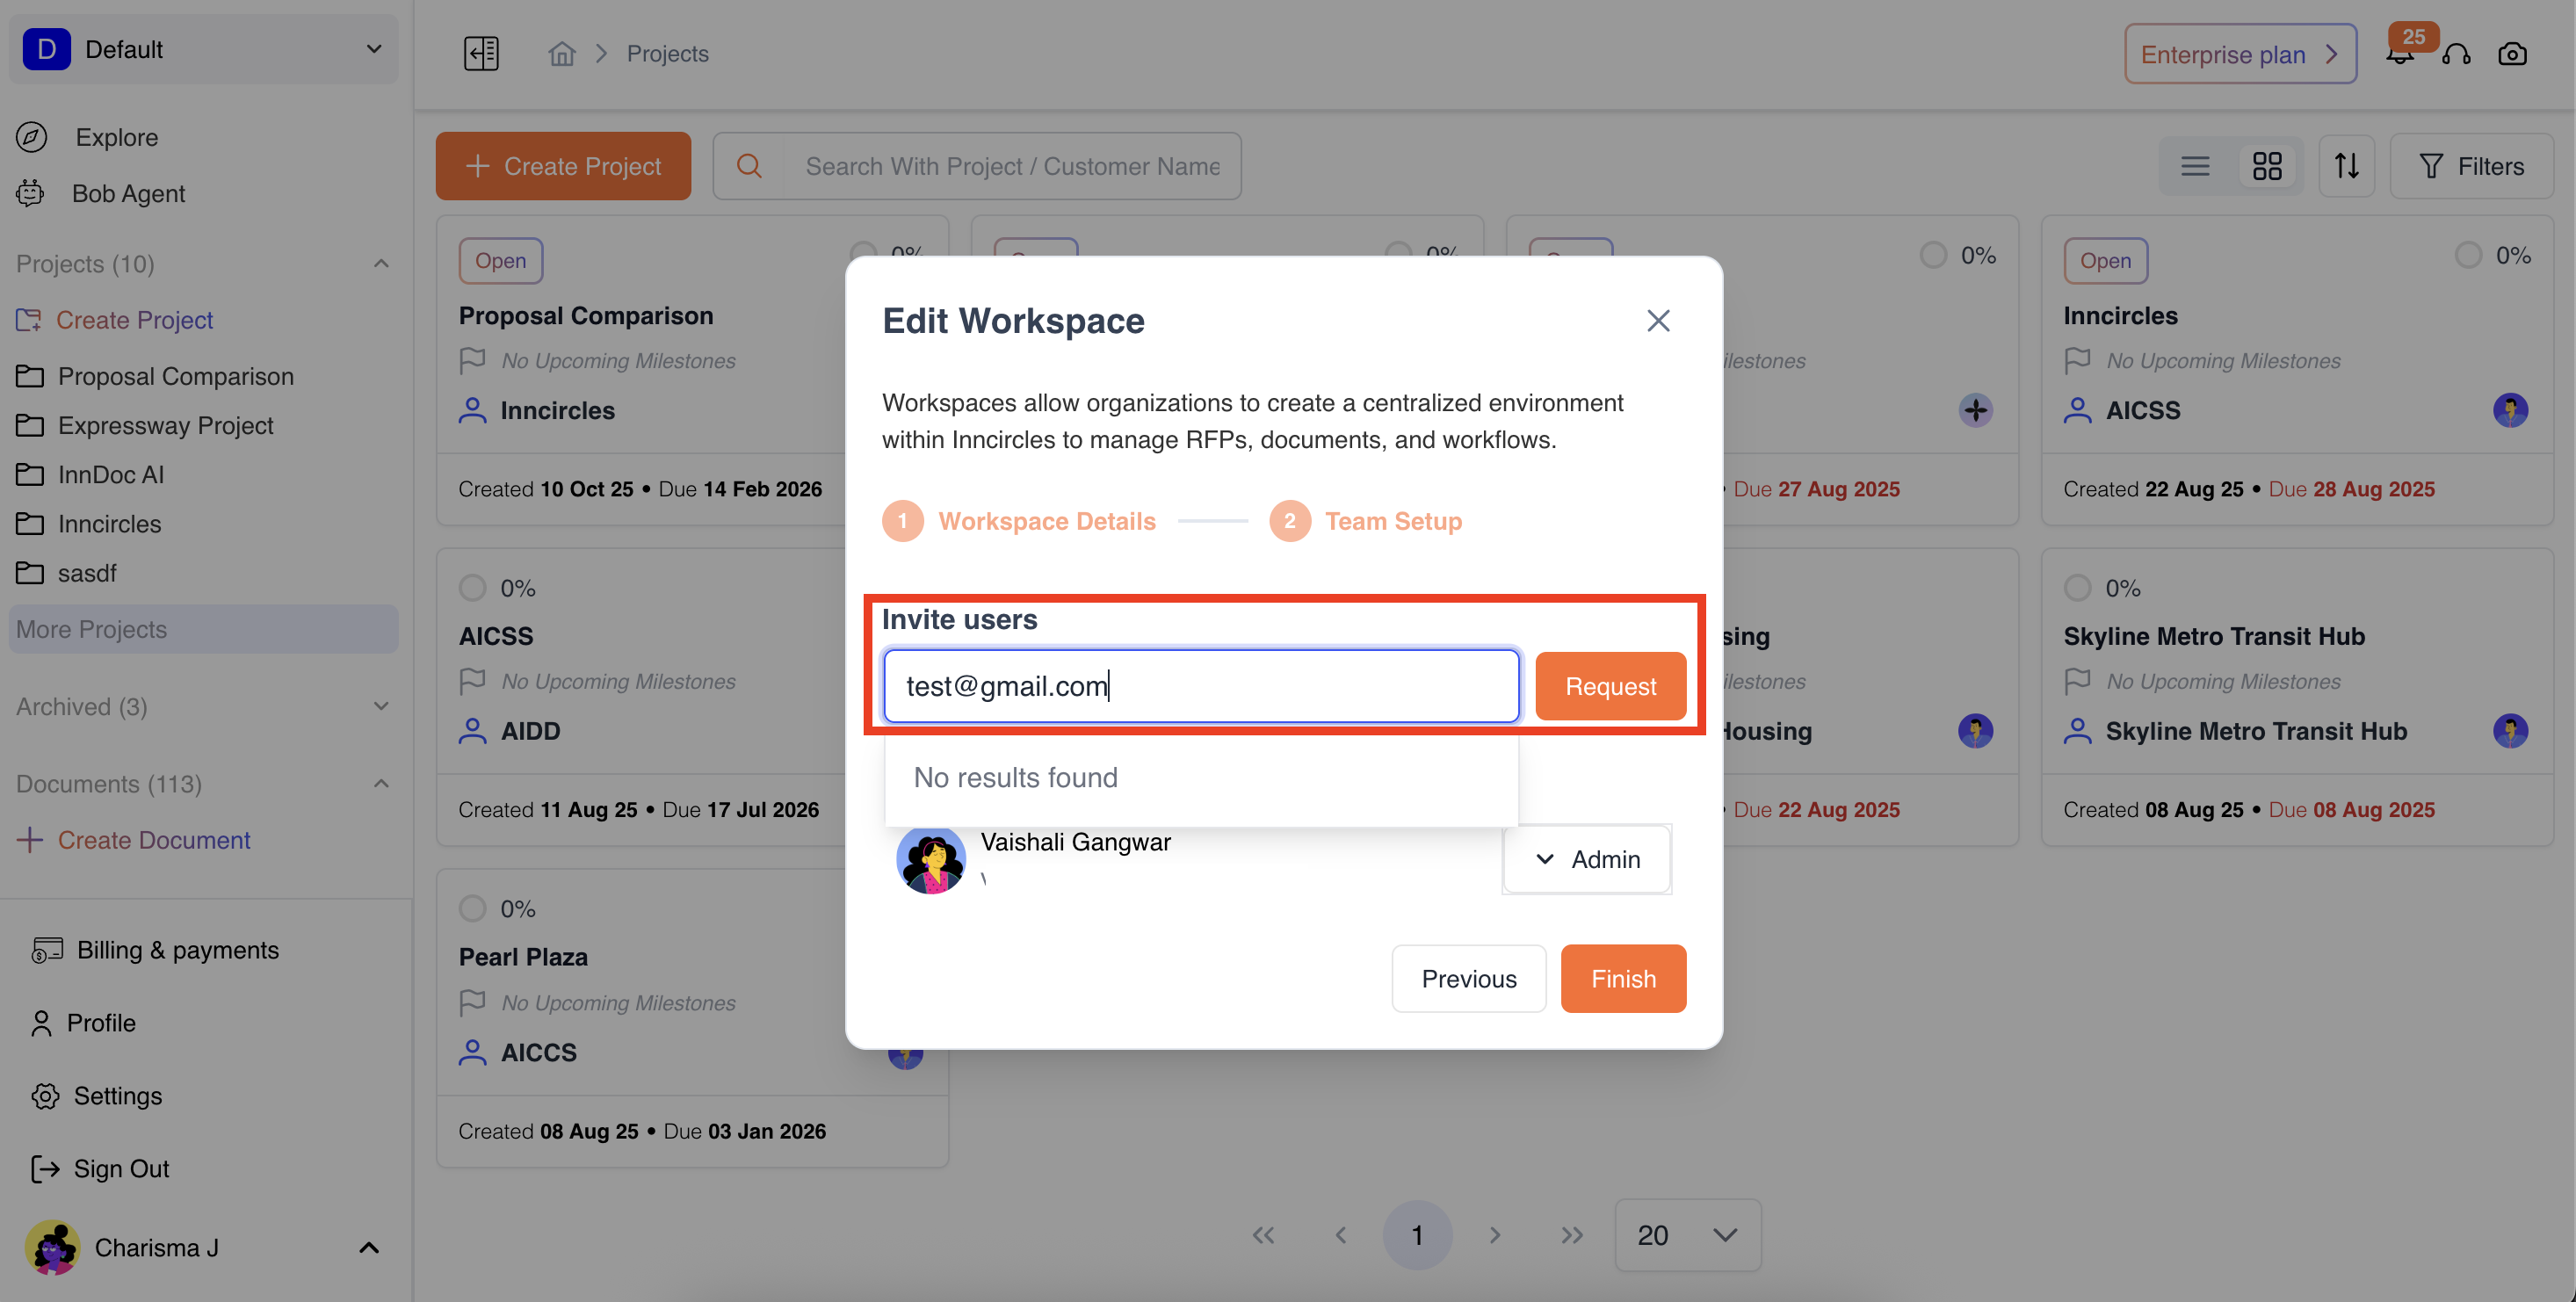
Add Workspace Details :
-
Name (must be unique)
-
Description
-
Color tag for visual identification
-
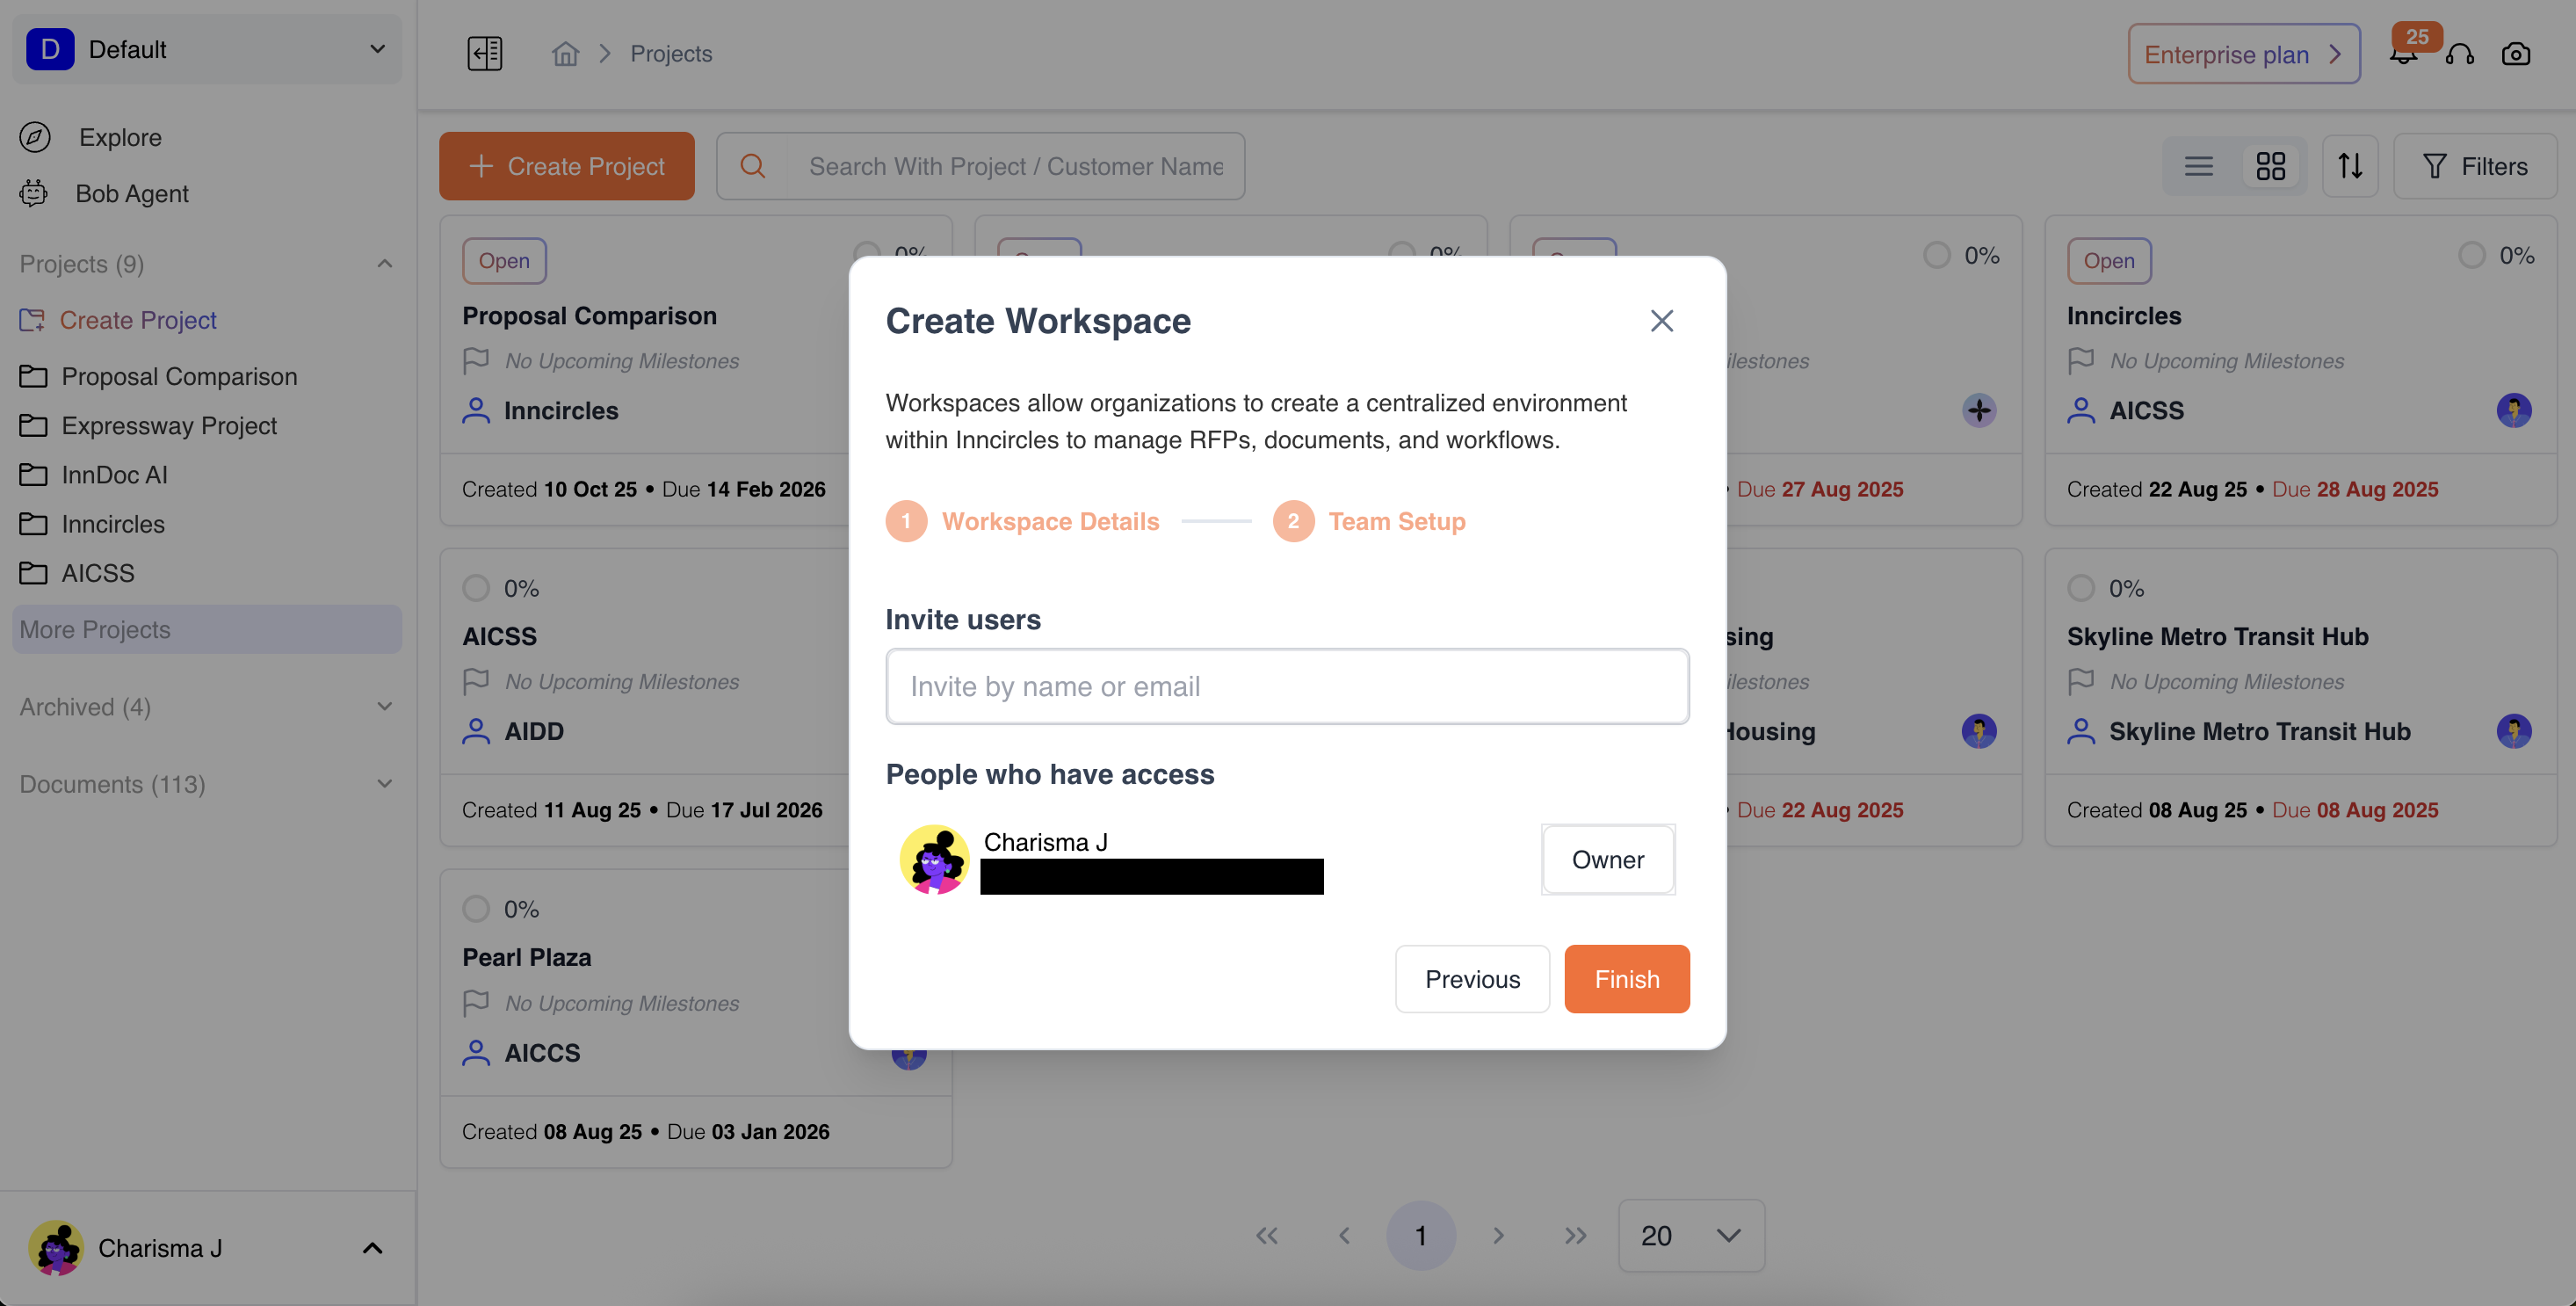
3.Add Team Members:
-
Choose from your organization’s directory.
-
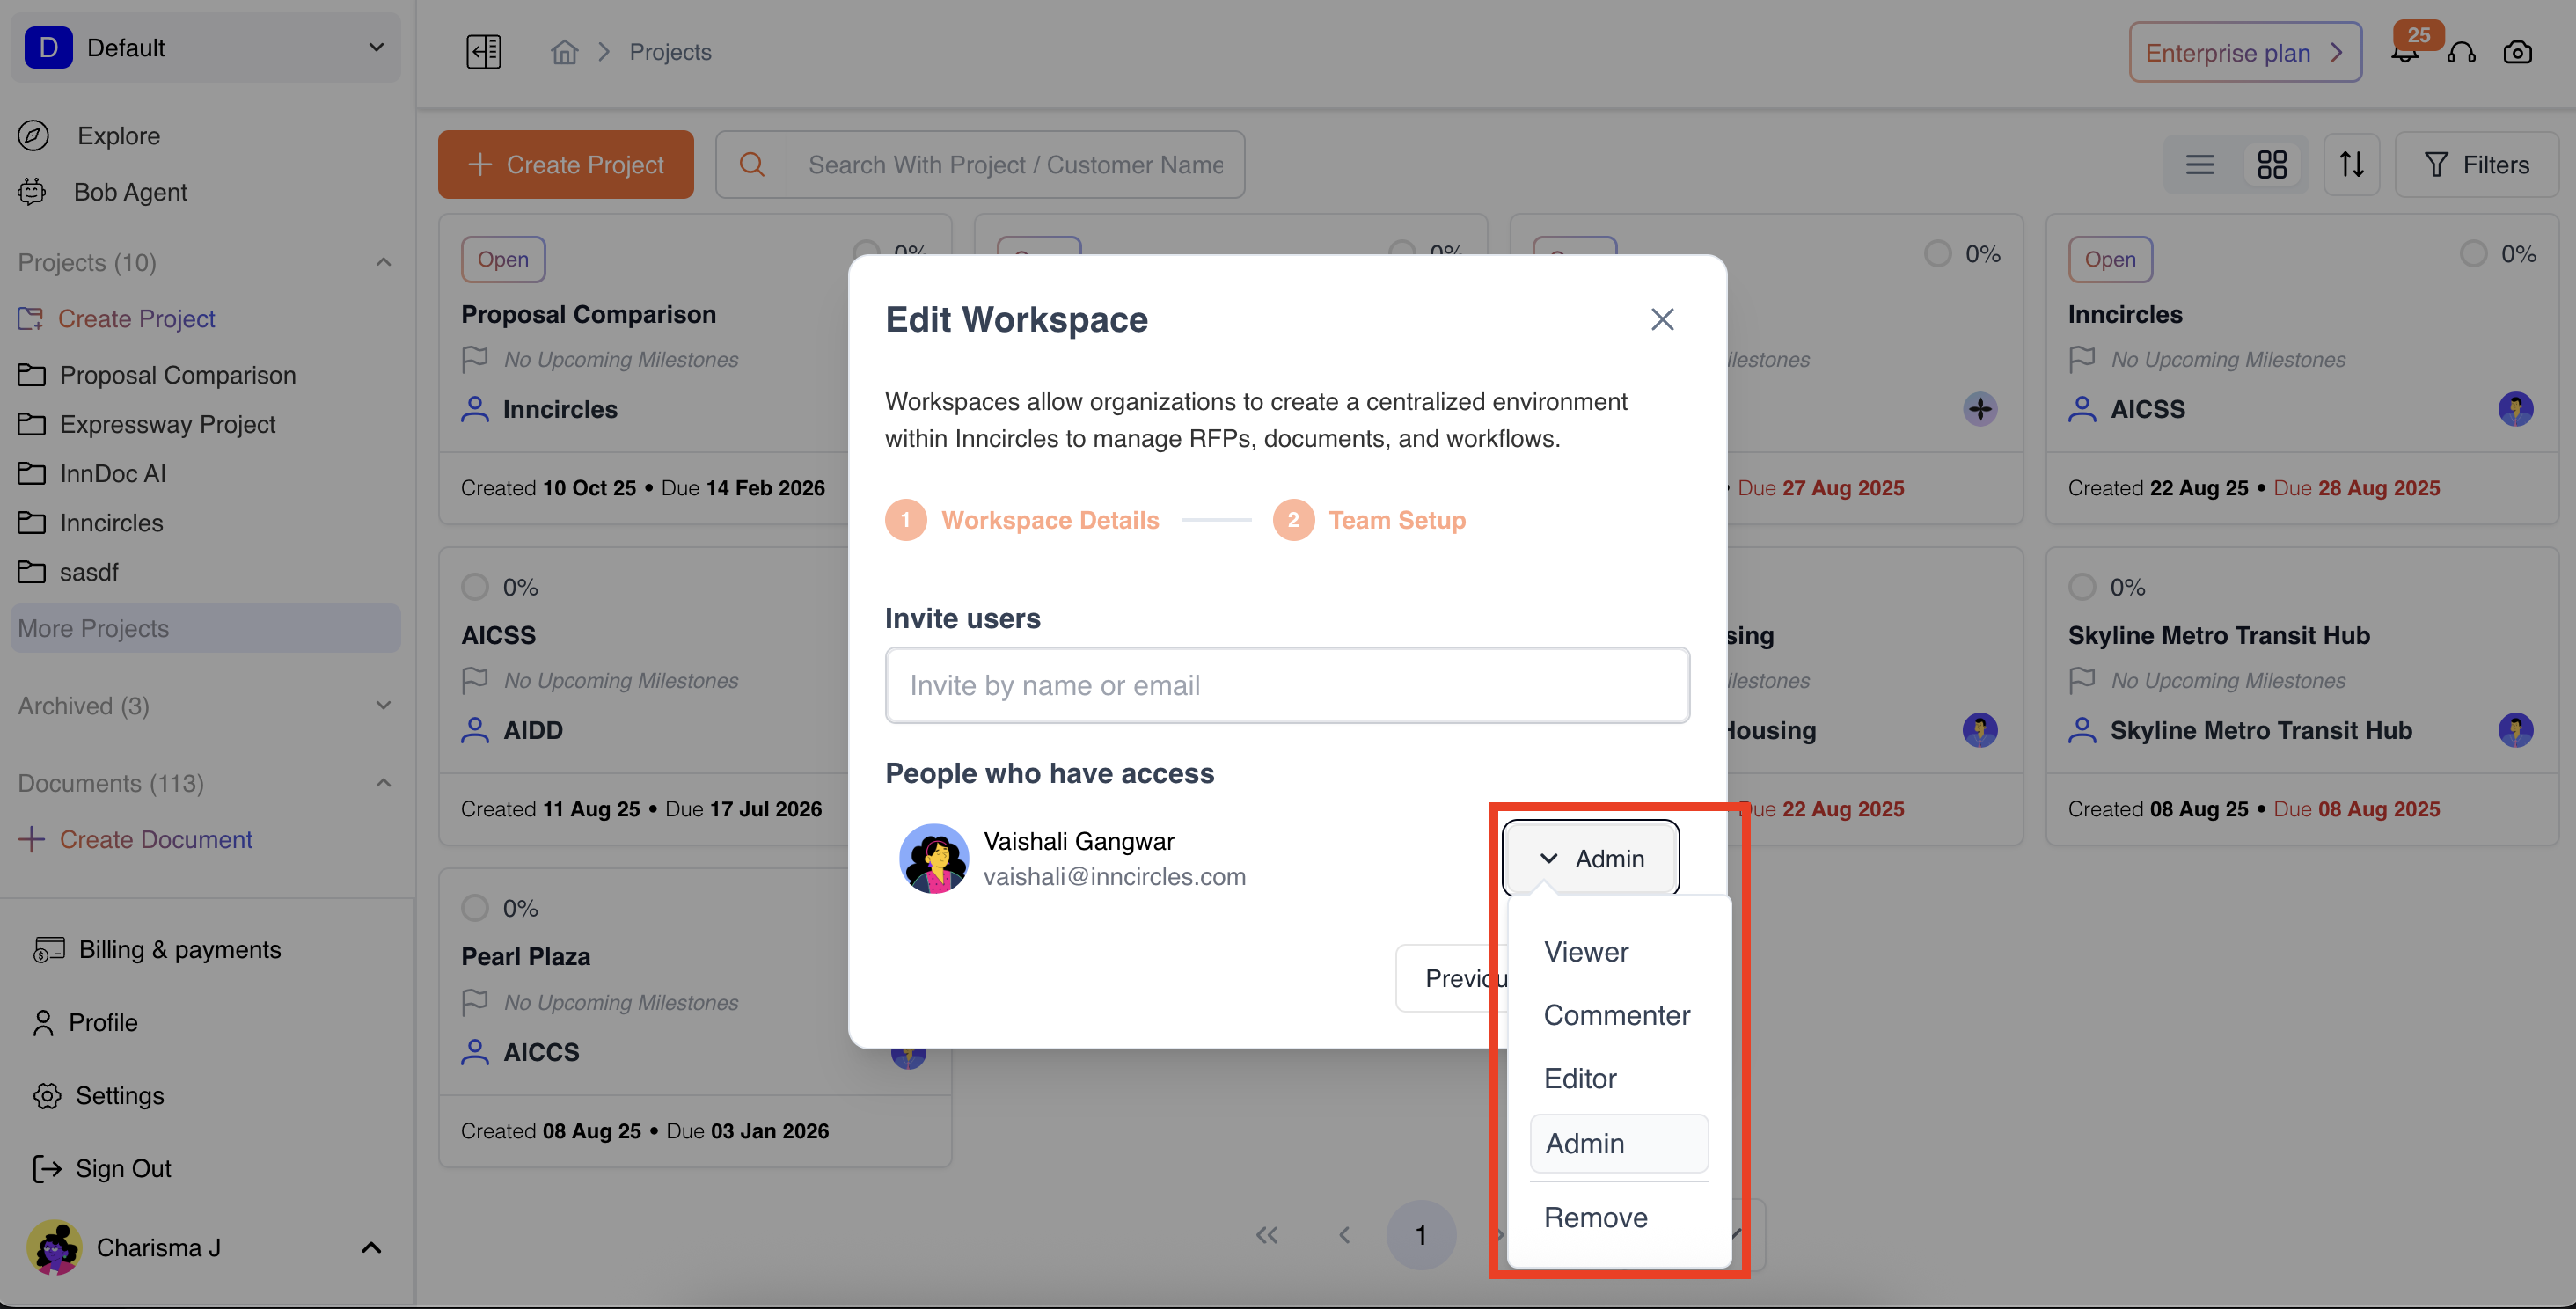
Set Roles: Assign roles such as Workspace Admin, Editor, commenter or Viewer.
-
Workspace Admin: Can view and edit the workspace details. Can access all the projects and documents within the workspace and will be given editor access to them by default unless the access level is restricted at the project or document level.
-
Workspace Editor: Can view all the workspace details. Can edit the projects and documents within the workspace by default unless the access level is restricted at the project or document level.
-
Workspace Commenter: Can view all the workspace details. Can comment on projects and documents but cannot edit by default unless the access level is restricted at the project or document level.
-
Workspace viewer: Can view all the workspace details. Can view projects and documents but cannot edit or comment by default unless the access level is restricted at the project or document level.
-
Remove: Can remove user if they are no longer needed in the workspace. They would still be present as am organisation member
-
-
If the user isn’t in the organization yet, request access from the Org Admin by adding their email address
- Review & Confirm: Click Create Workspace → You’ll see a success message and notifications go to all members.
Updated 2 days ago